HAND-CRANKED FLIP WINDOW
Midnight Express
A steam train waits at a snowy North Pole platform. Turn the handwheel at the back of the cab and twenty pictures flip in its window, one click at a time. They tell one story: a present falls off Santa's sleigh, travels through the forest and by train, and is opened under the tree on Christmas Eve.
Assemble
1Load the twenty flaps
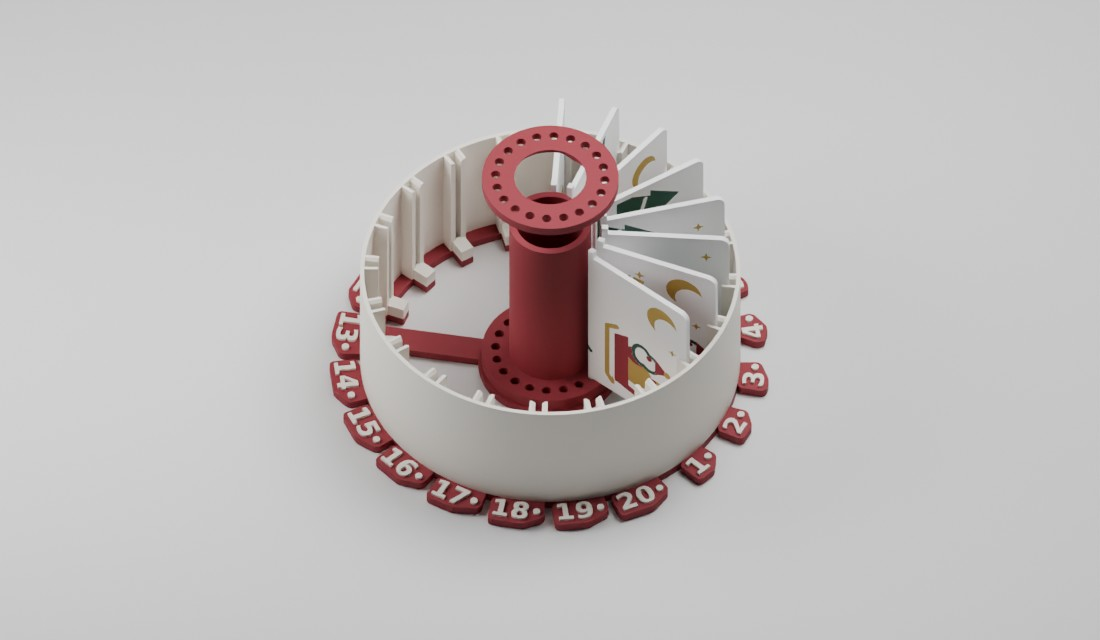
Place spool A disc-down over the loading stand’s keyed pin. Drop flap 01 into the groove just right of the raised 1, with the Santa sets off picture (Santa's sleigh over the rooftops) facing the 1 and its lower tab in spool A. Repeat for flaps 02–20, matching each filename number to the raised number. Align the flats and lower spool B over the tube, lip up. Its funnelled holes guide all twenty upper tabs into place. Press until the lip stops on the end of the tube, then lift the drum off the stand. Each flap should swing freely between the discs.
2Seat the drum
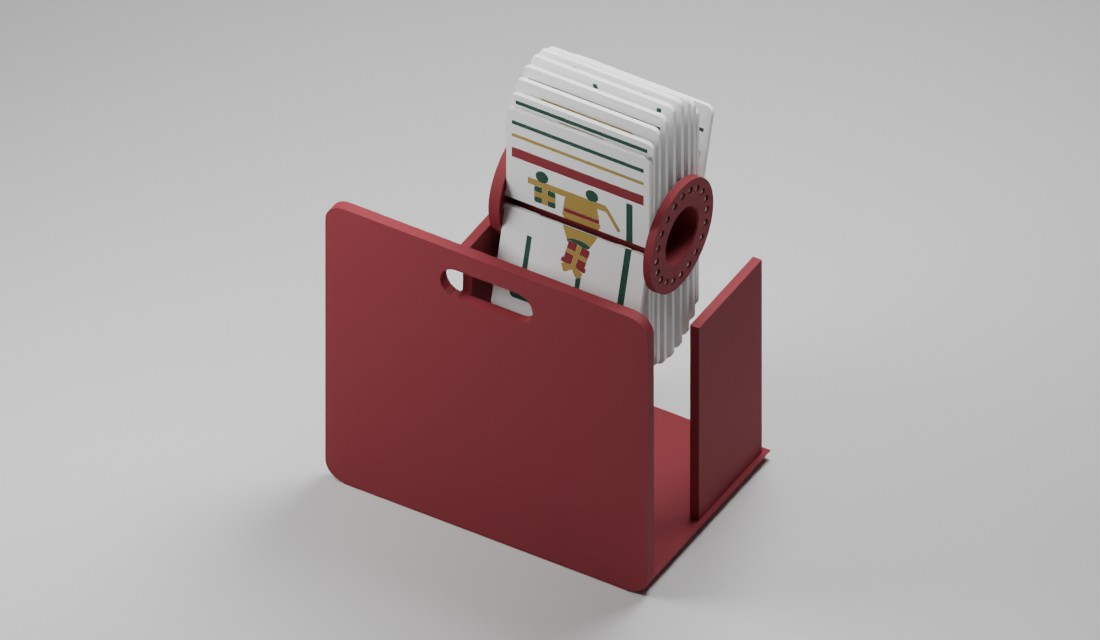
Tilt the loaded drum into the chassis from its open side, spool B end first. Slide B’s tube over the round stub on the far wall. The wall can flex slightly as the drum seats. Align spool A with the large round hole in the divider wall. Turn the drum by hand. The tabs should stay seated as the flaps fall.
3Fit the axle and pawl
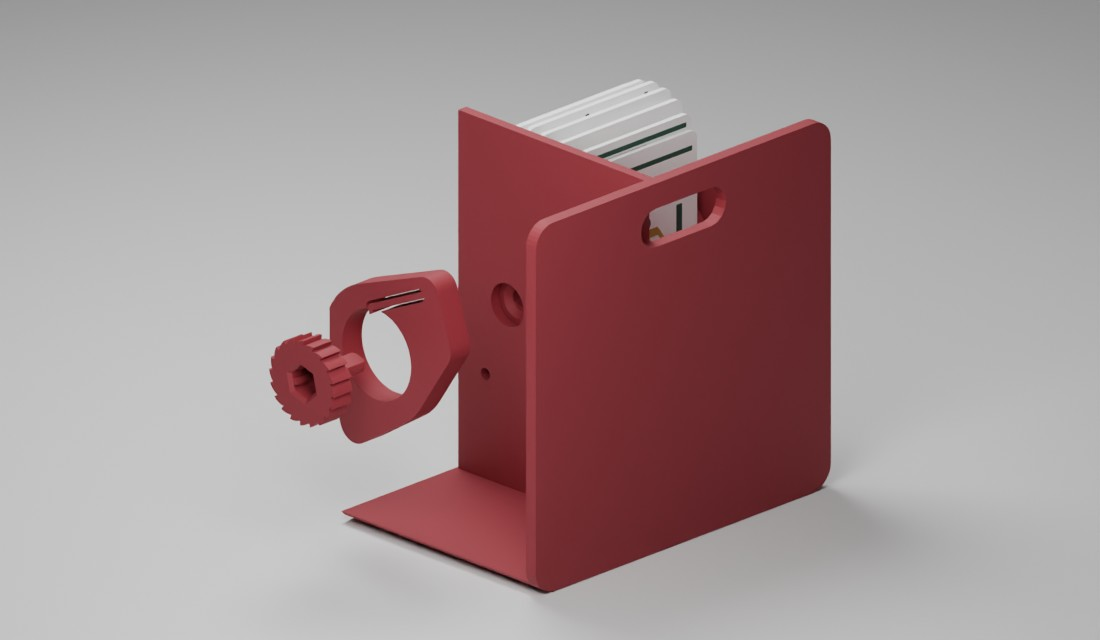
Push the keyed axle into the pawl bracket, turning it until the teeth slip past the pawl. Align the D-shaped axle tip with spool A. Feed it through the divider’s large hole into spool A, then press the bracket’s two pegs into the two small divider holes. The bracket sits flat. The axle clicks forward as the top of the drum moves toward the picture window.
4Slide the chassis into the cab
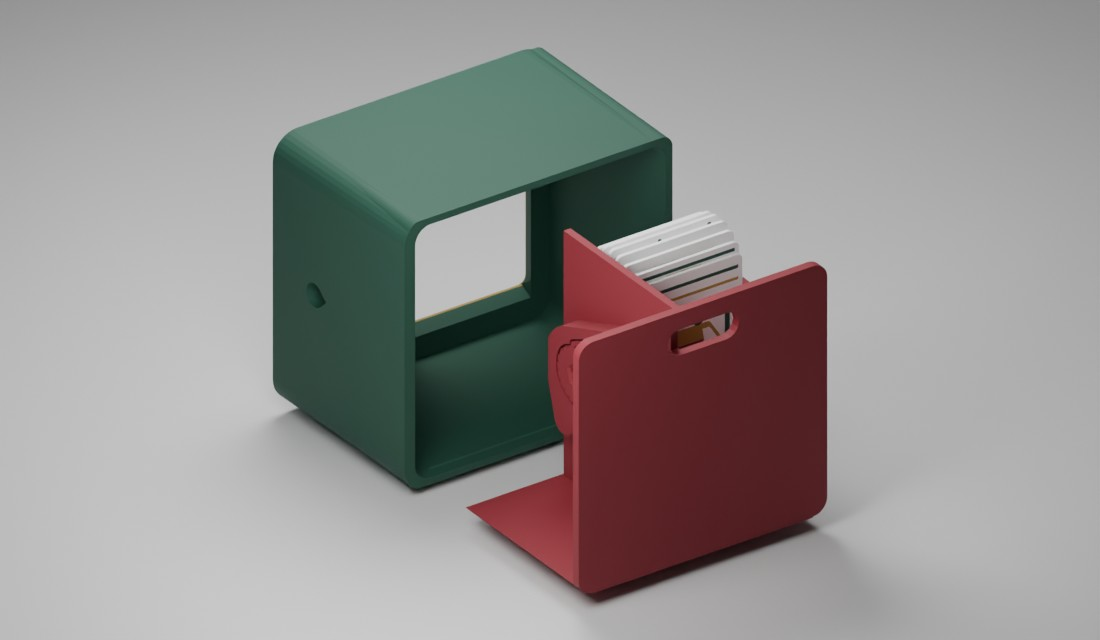
Keep the cab off the locomotive deck. Slide the complete chassis into the open back of the cab, with the flaps facing the picture window. Press it past the retaining ridge in the cab floor. The pictures sit behind the window. The finger slot stays accessible from the open back.
5Fit the wheels and rods
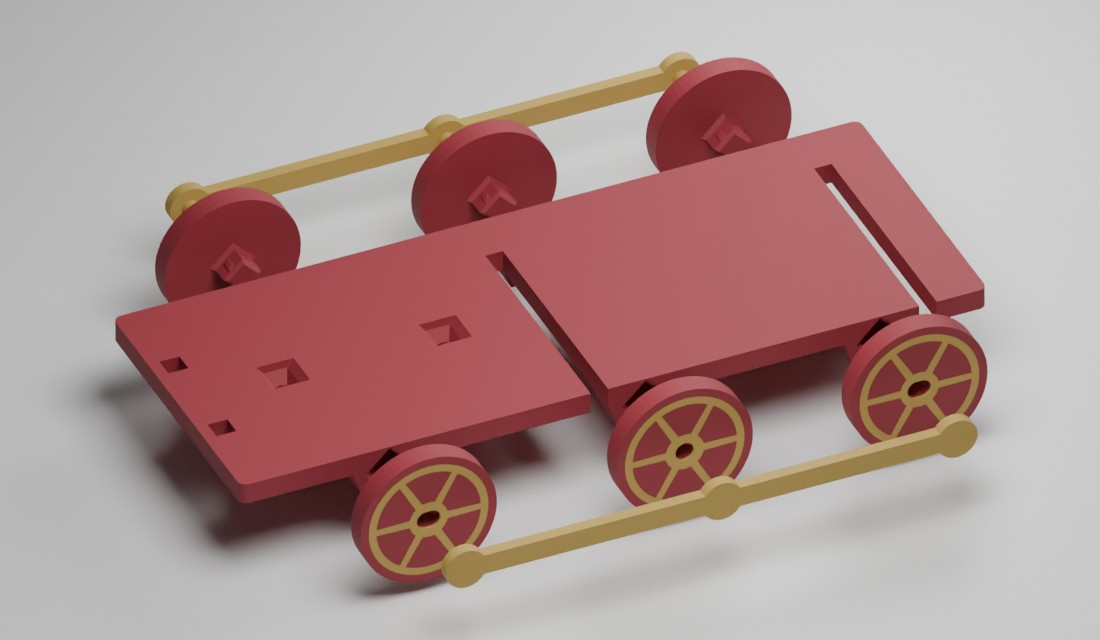
Line up each diamond peg with its deck socket. Support the deck near the socket and press the wheel straight in with your thumbs. If it binds, pull it out and check alignment and any stray filament before trying again. Once all six wheels are fully seated, line up each gold rod with its three hubs. Seat the middle peg first, then guide the outer pegs in. Stop if the rod bows or needs force. Each wheel sits square to the deck and each rod lies flat across three hubs.
6Fasten the boiler
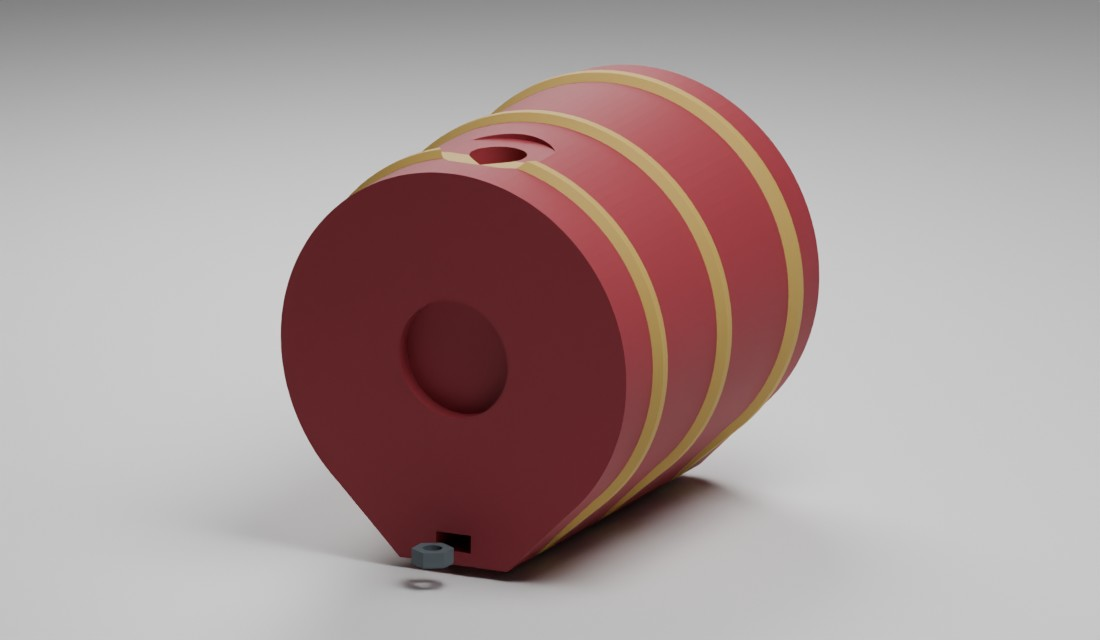
Slide one M3 nut along the flat floor of the rectangular slot at each end of the boiler. Push each nut to the stop so its hole lines up with the screw hole. Lower the boiler onto the deck so its locating keys drop into their recesses. Rest the deck level on two blocks, with both screw holes accessible from below. Start both M3 screws from below by hand, then tighten them gently with the hex key until the boiler sits flush. The boiler sits flat and both screw heads rest against the underside of the deck.
7Assemble the handwheel
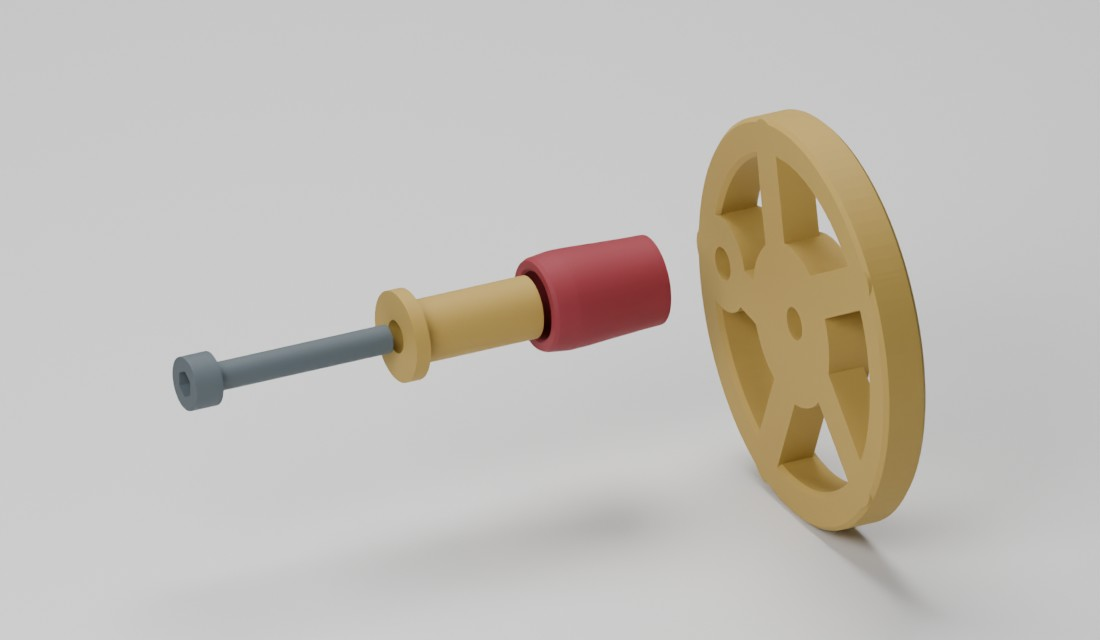
Seat an M3 nut in the pocket on the back of the spoked wheel, behind the off-centre grip mount. Slide the bushing through the grip, leaving its wide flange at the outer end. Bring the grip and bushing to the wheel, pass the M3 × 20 mm screw through the bushing and gently snug it with the hex key. The screw head should sit against the bushing flange. Hold the shaft with its open nut slot facing up and drop in the second M3 nut. Seat the wheel’s rear socket on the shaft key, then gently snug the M3 × 8 mm screw through the hub. The grip spins freely after the screw is snug. If it binds, remove the grip screw and check that the flange faces outward and the bushing sits flat against the wheel. Reassemble and check again.
8Fit the front details
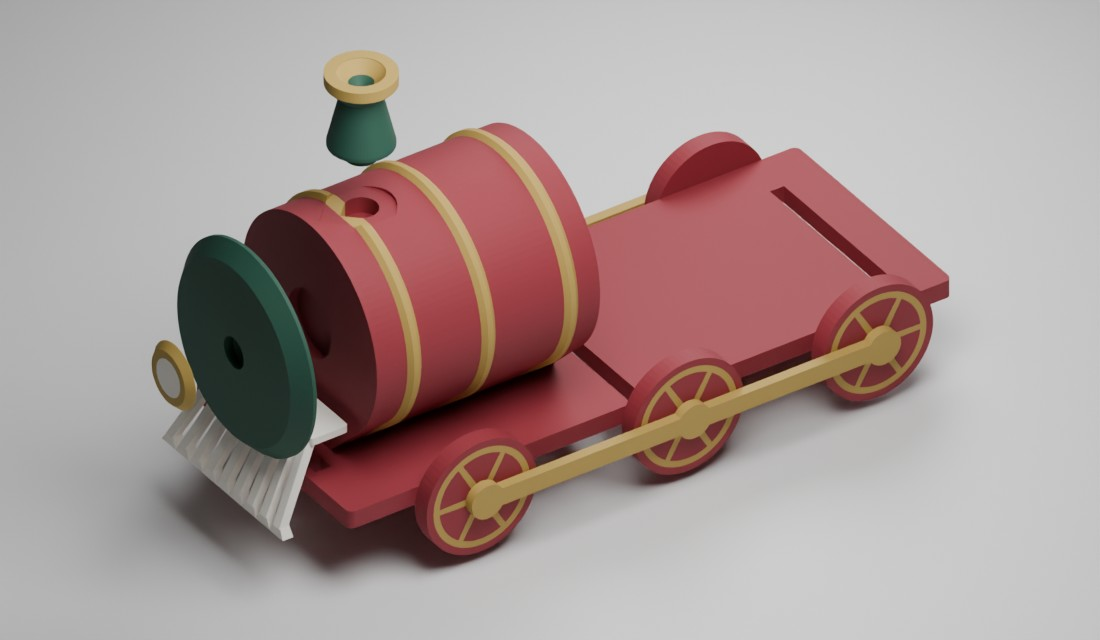
Support the boiler near its nose. Push the smokebox straight into the round opening until its rim meets the boiler. Press the headlamp by its gold rim until it sits against the smokebox. Hold the chimney near its base and lower it into the opening on top of the boiler. Press until its base meets the seat. Line up both cowcatcher pegs with the deck’s nose sockets. Support the deck and press straight down on the cowcatcher’s solid top plate. If any part binds, check alignment and clear loose filament. The smokebox, lamp and chimney sit flush, and the cowcatcher’s top plate rests flat on the deck.
9Seat the cab and fit the handwheel
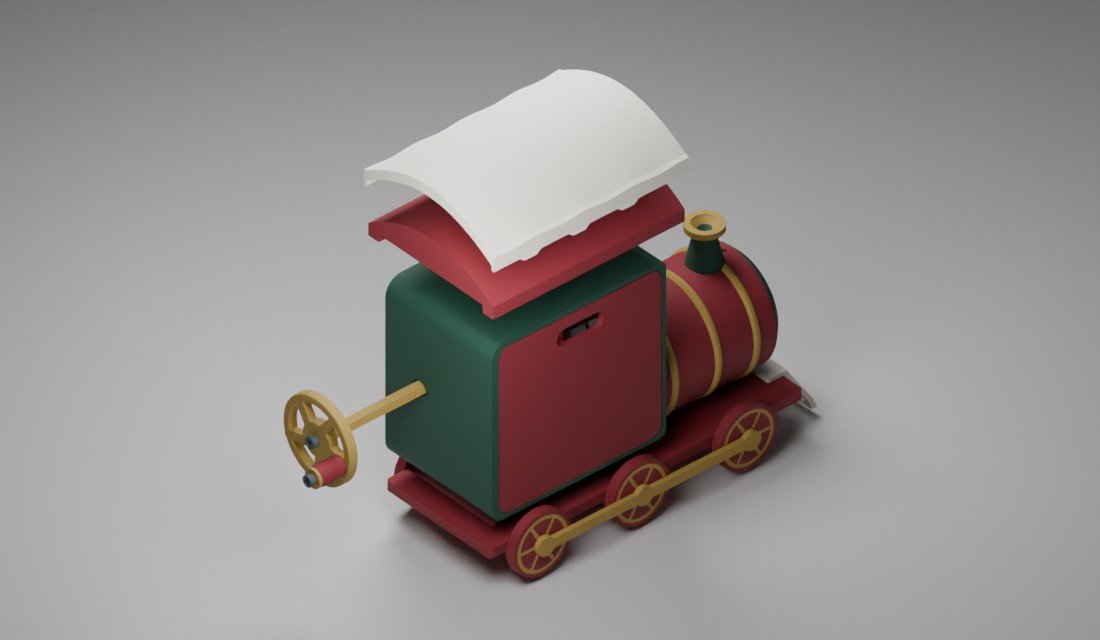
Lower the cab onto the deck’s two locator keys. Fit the burgundy roof over the cab, then the cream snow cap over the roof. Slide the handwheel shaft through the round opening at the back of the cab. Turn the wheel to align the groove in the shaft’s hex tip with the rib in the axle socket, then push the shaft fully into the socket. Turn the handwheel in the direction that moves the top of the drum toward the picture window. Stop if the ratchet resists.
10Set the departure platform
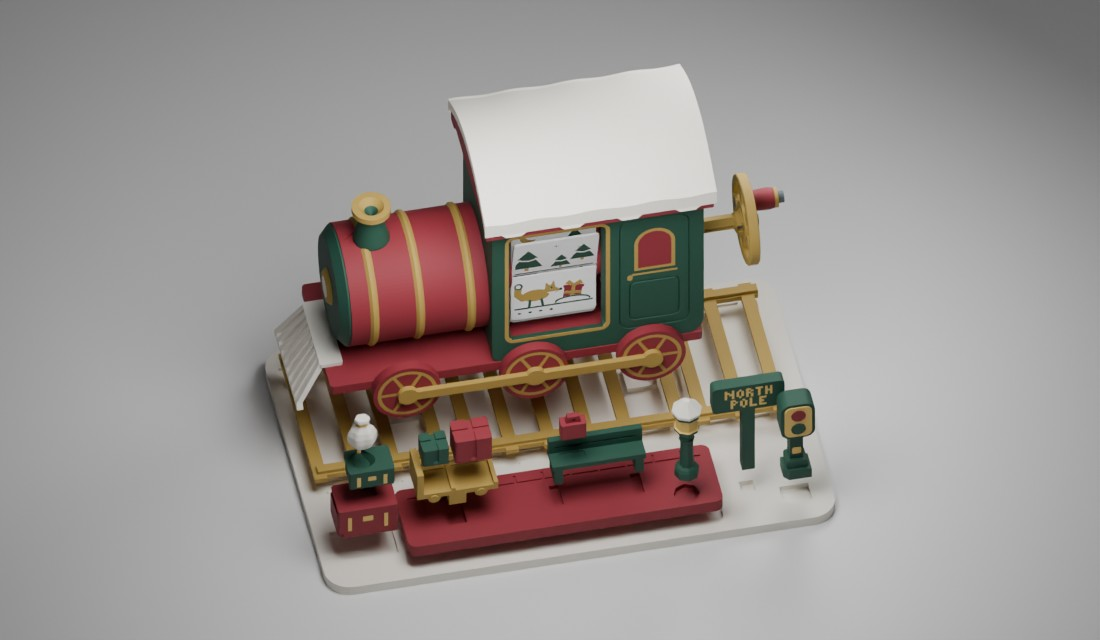
Drop the track and platform into the matching base recesses. Lower the locomotive’s two support feet into the raised sockets in the base. Seat the sign, signal and lower trunk in their matching base pockets. Lower the green trunk onto the lower trunk’s keyed seat, then seat the mail sack on top. Seat the lantern, bench and trolley in the platform recesses. Lower the suitcase into the bench recess. Seat the smaller parcel in the bay by the trolley’s raised handle and the larger parcel in the other bay. The locomotive stays seated while you turn through all twenty pictures, one click at a time.