HAND-CRANKED FLIP WINDOW
The Kiosk
A street kiosk on a strip of pavement. Turn the crank on its side and the seller's day flips past in the window, twenty pictures from the shutter going up in the morning to the shutter coming down at night.
Assemble
1Load the spool
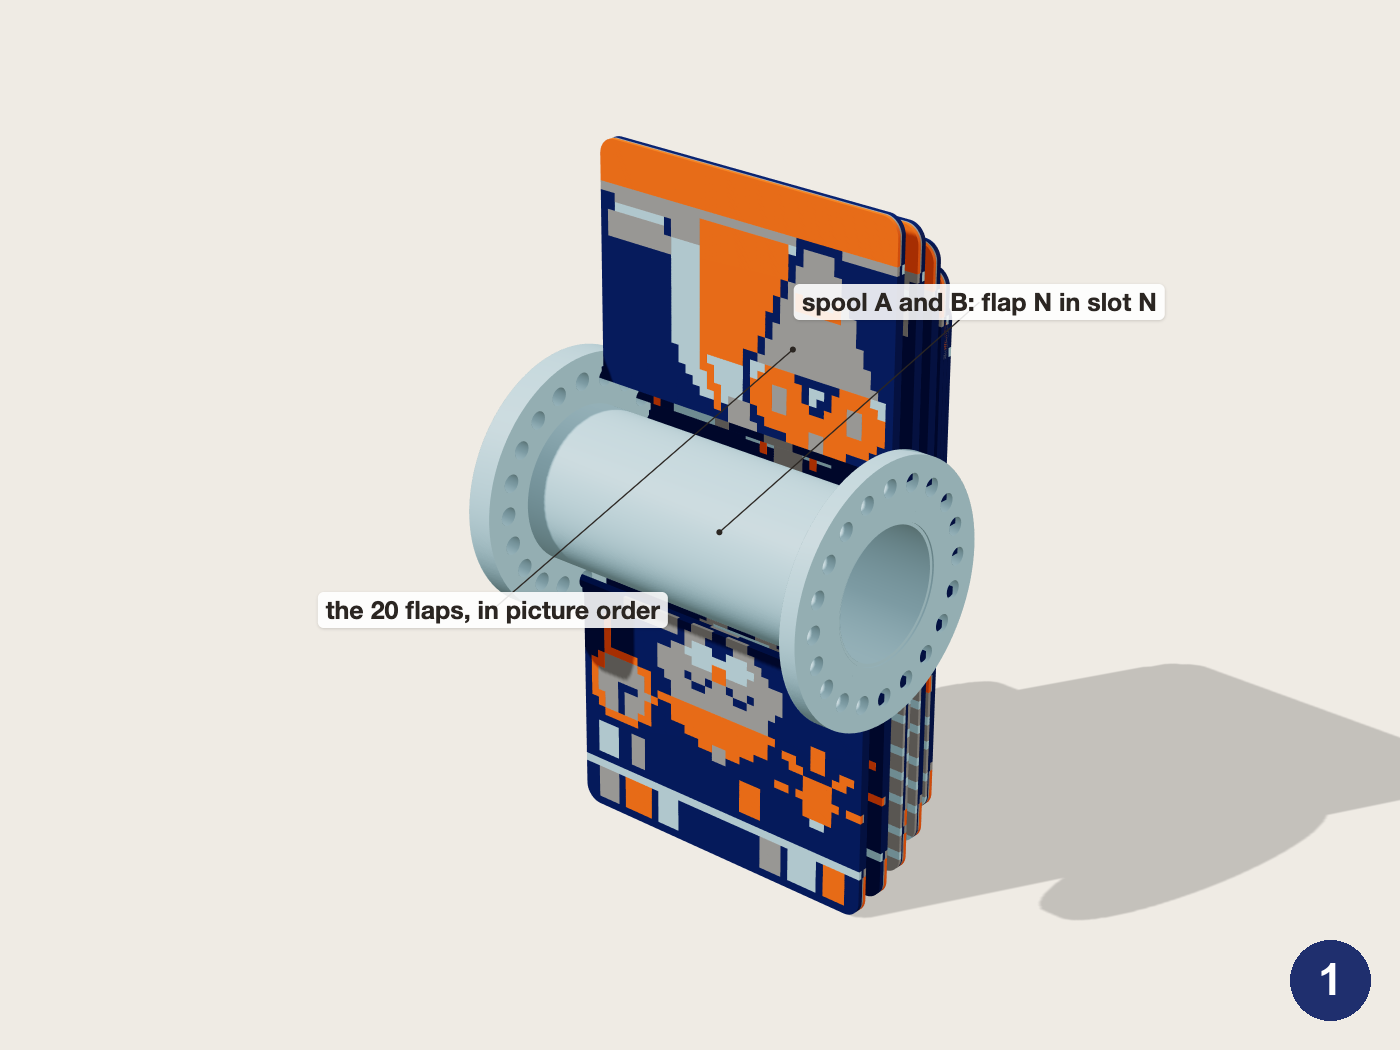
Set spool A disc-down on the loading stand's pin. Drop flap N into the slot just right of number N, the top half of picture N facing the number. Press spool B down the tube, lip up, until it stops on the tube's end. Its funnelled holes catch all 20 tabs. Lift the loaded spool off the stand.
2Spool into the chassis
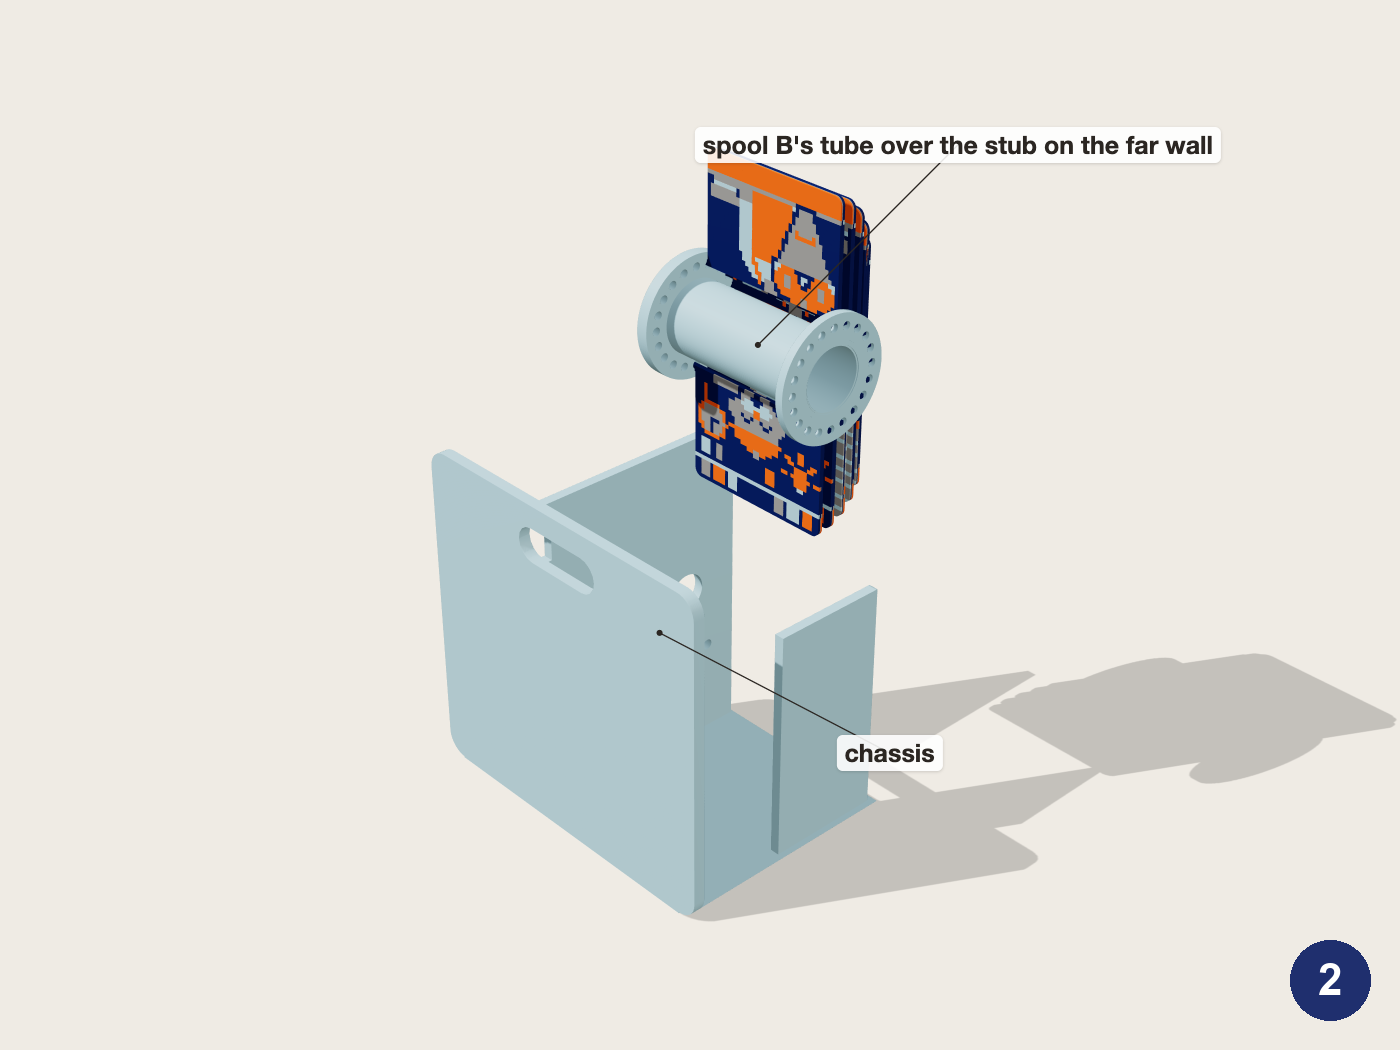
Tilt the loaded spool into the chassis: spool B's tube over the stub on the far wall, spool A at the divider's round hole.
3Axle and ratchet
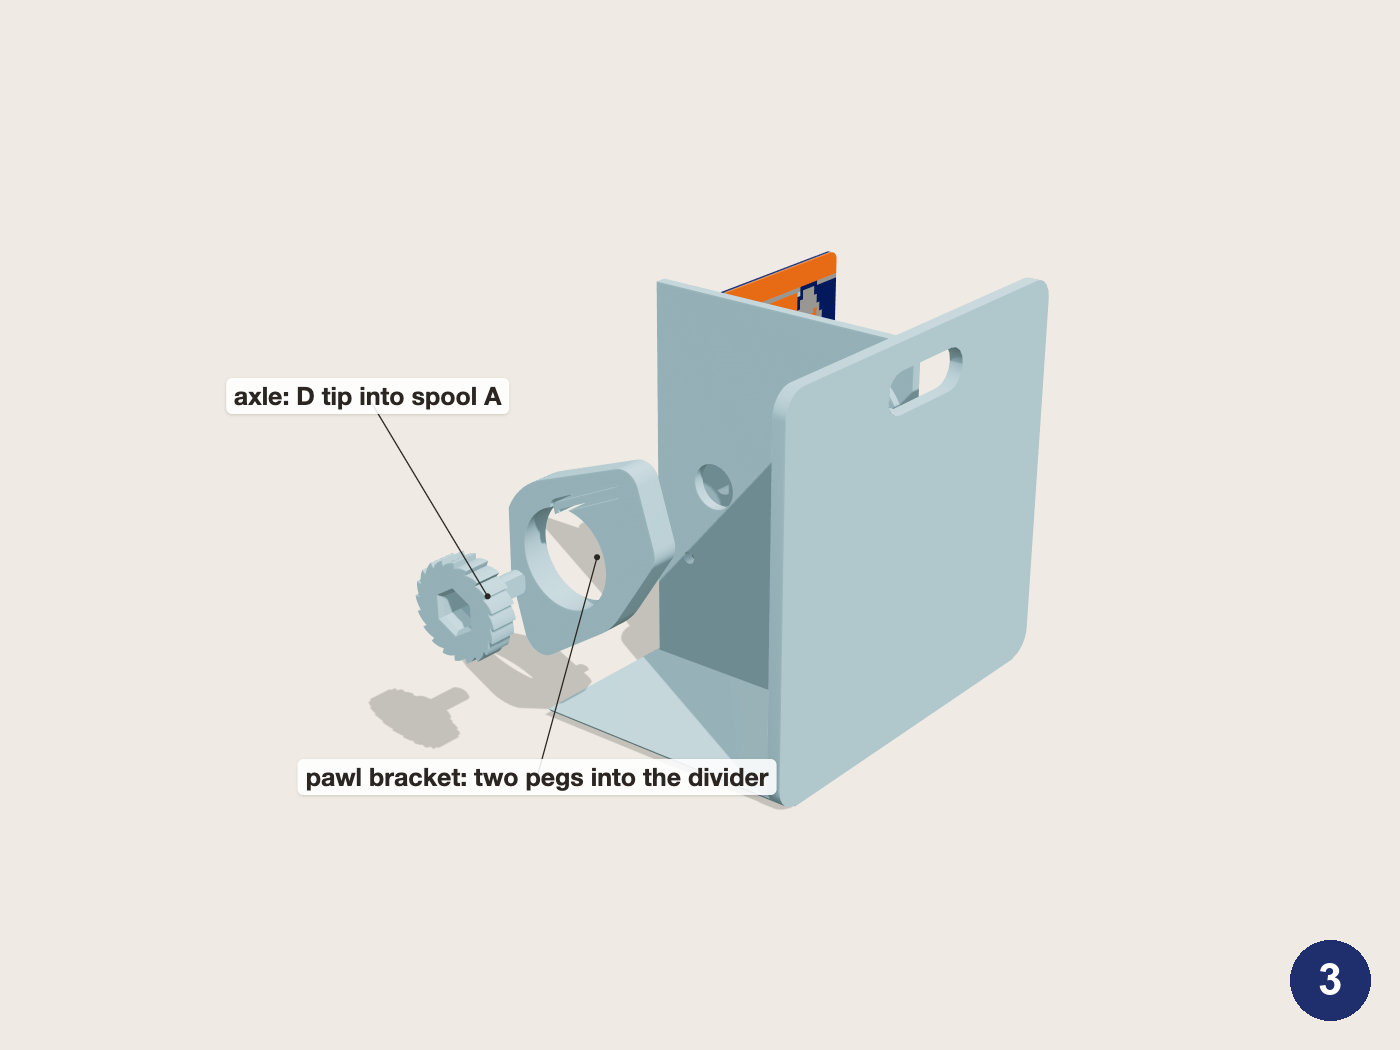
Push the axle into the pawl bracket, turning it until the teeth slip past the pawl. Feed its D-shaped tip through the divider into spool A and press the bracket's two pegs into the divider's two small holes. Turn the axle by hand: it clicks once per picture going forward and refuses to turn back.
4Into the kiosk
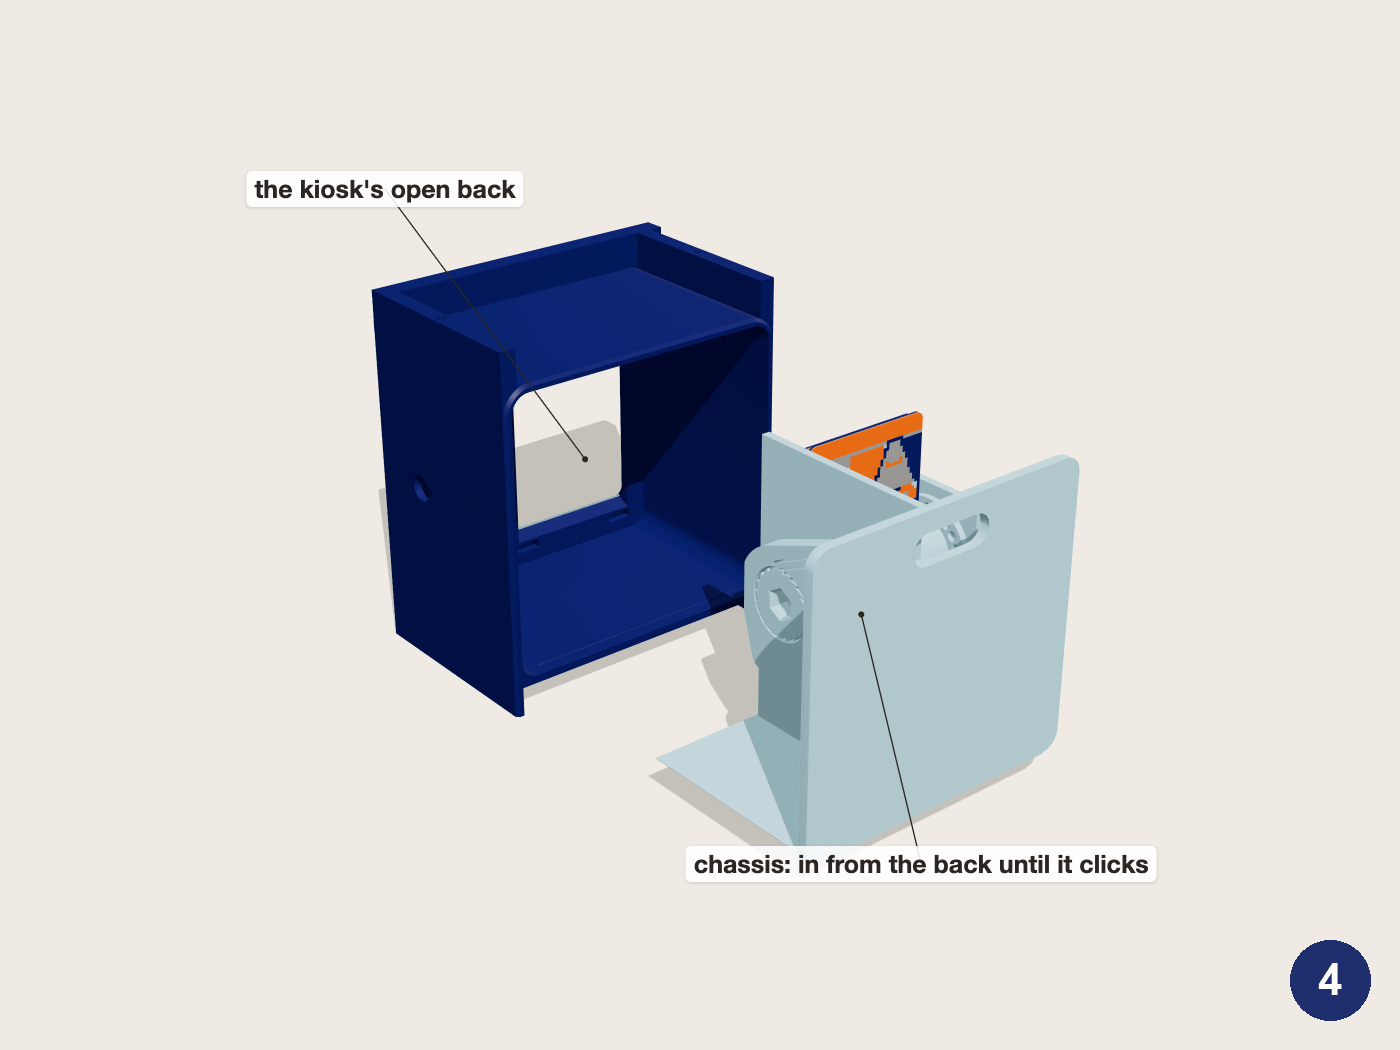
Slide the chassis into the kiosk from the back until it clicks over the ridge on the floor.
5The counter
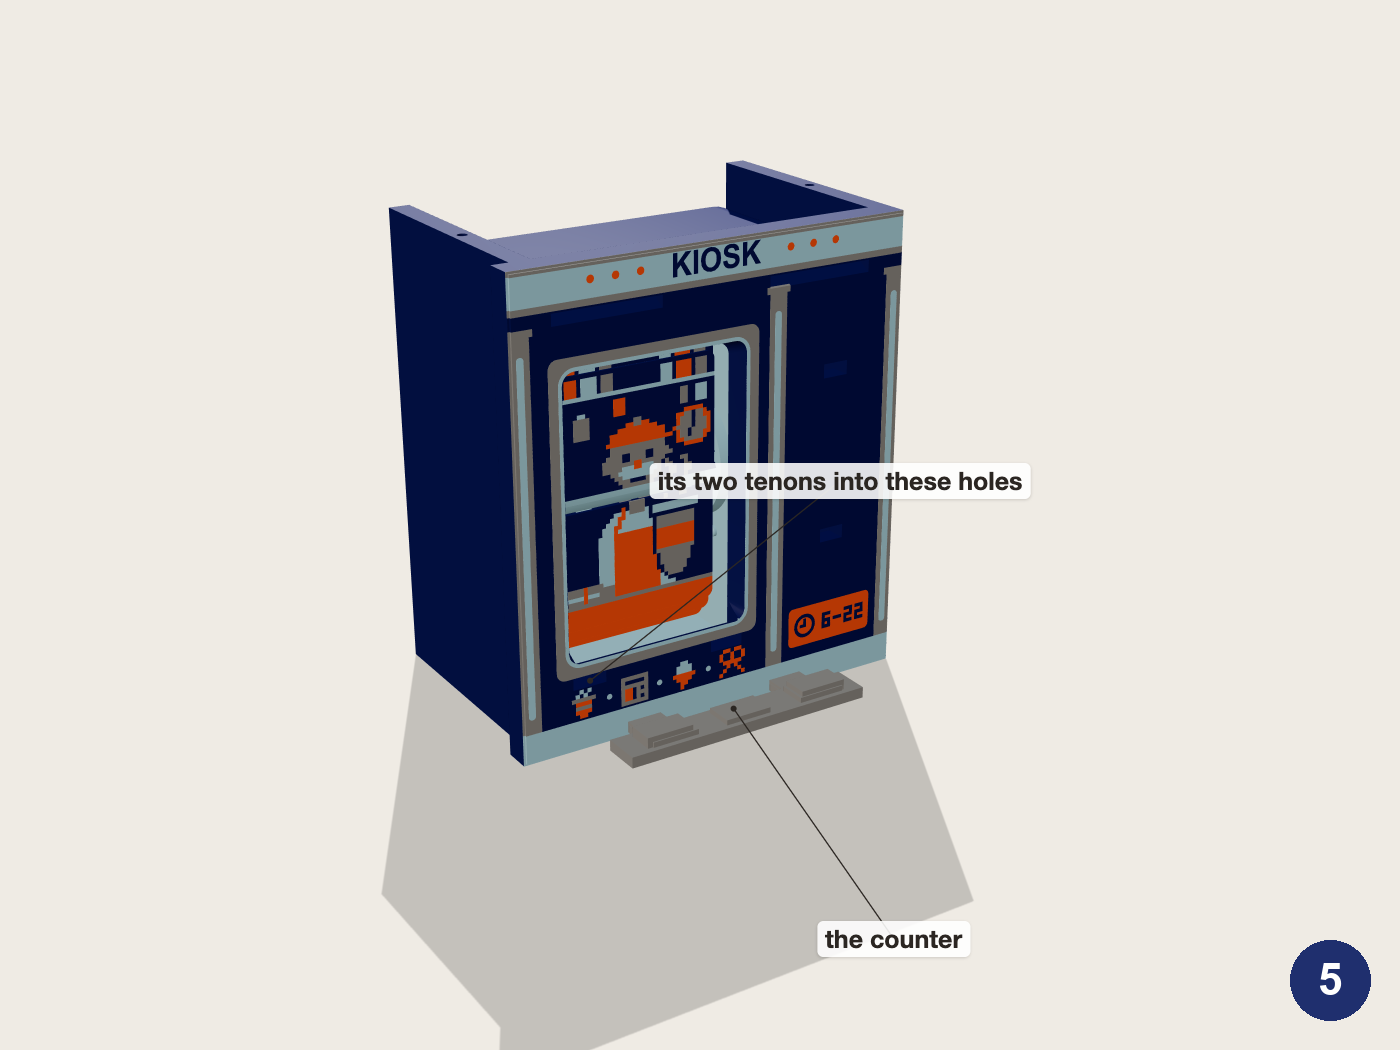
Push the counter's two tenons into the two holes under the window, the papers on top, until it sits against the face. Small ribs on the tenons hold it.
6The canopy
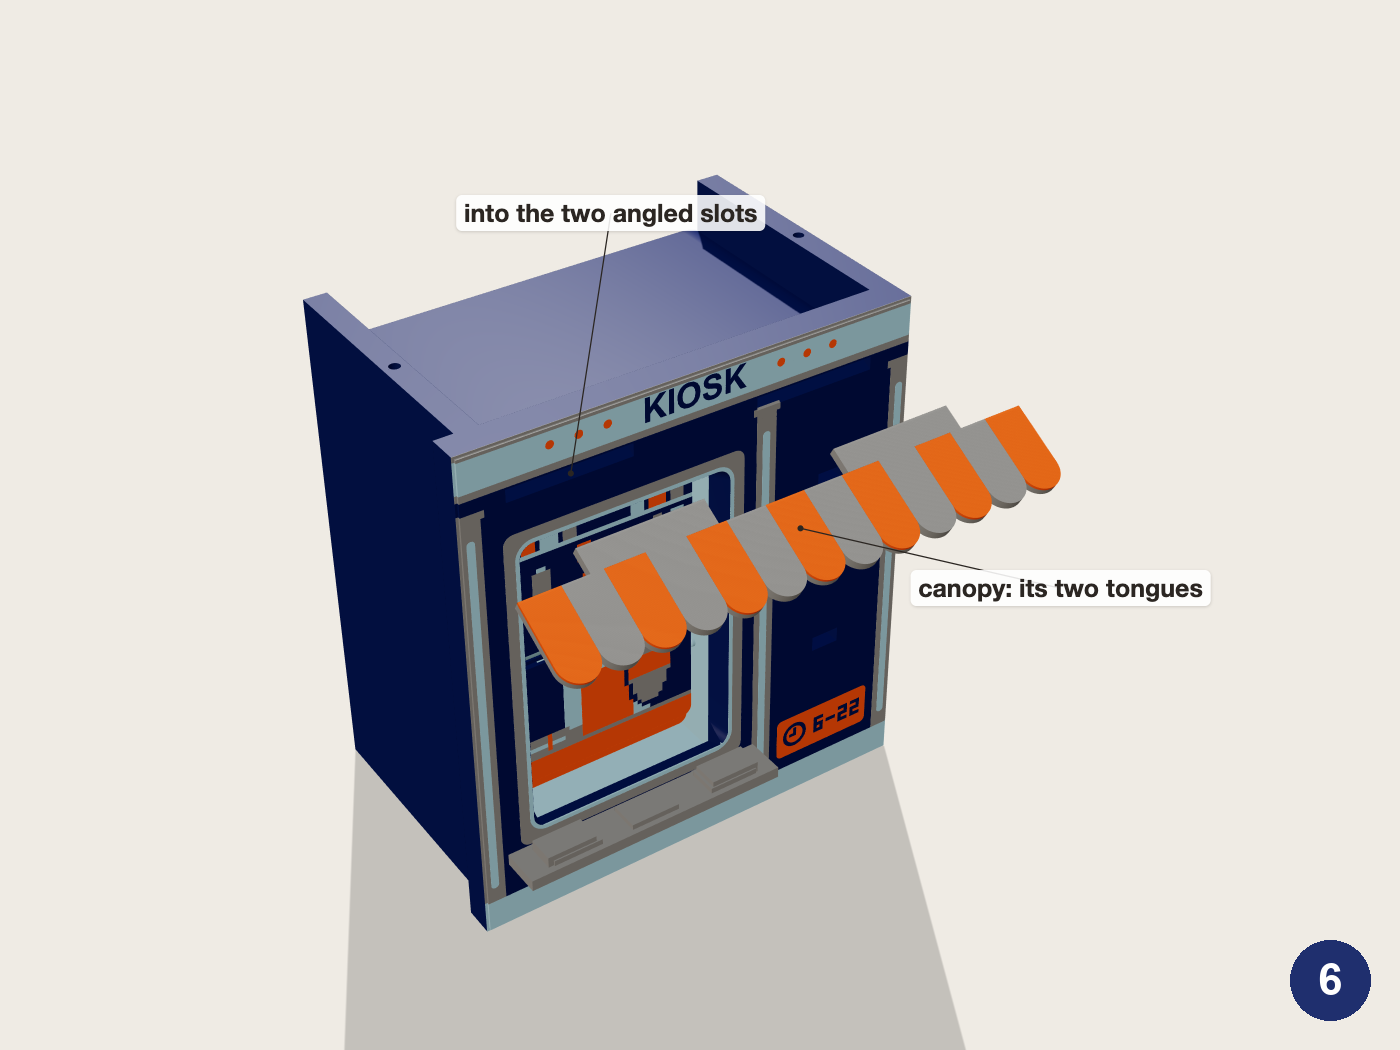
Slide the canopy's two tongues into the two angled slots over the window, stripes up, until it stops against the face. Two small bumps under each tongue hold it.
7The roof
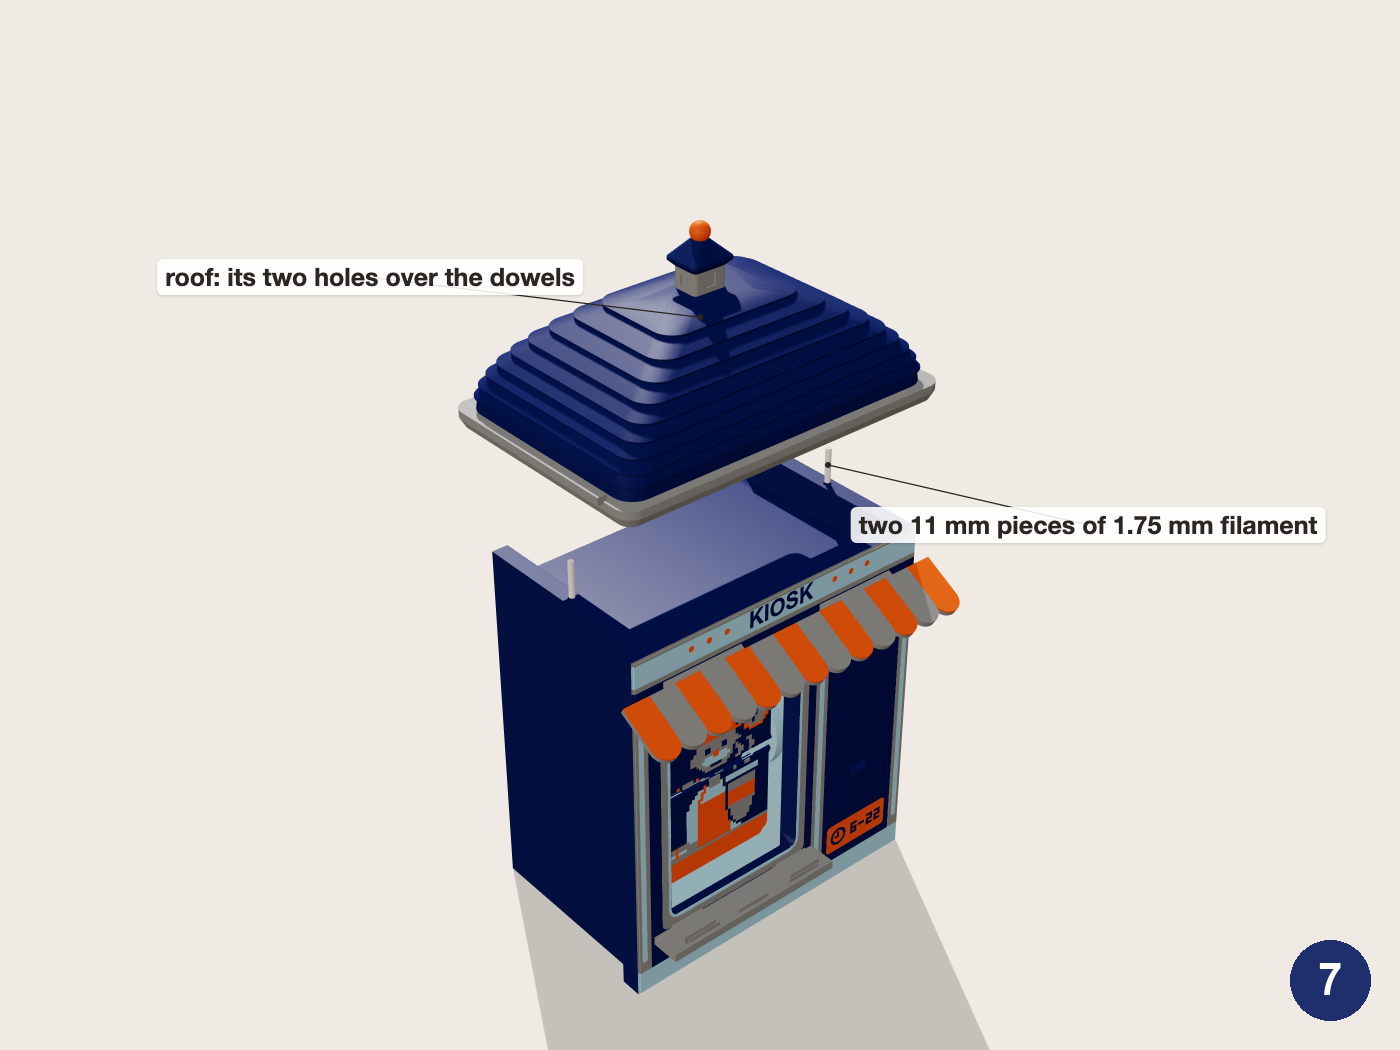
Cut two 11 mm pieces of 1.75 mm filament. Push one into each hole on top of the two short walls behind the face, about half its length. Lower the roof onto them, its two holes over the dowels, until it lies flat on the face and both walls.
8Onto the pavement
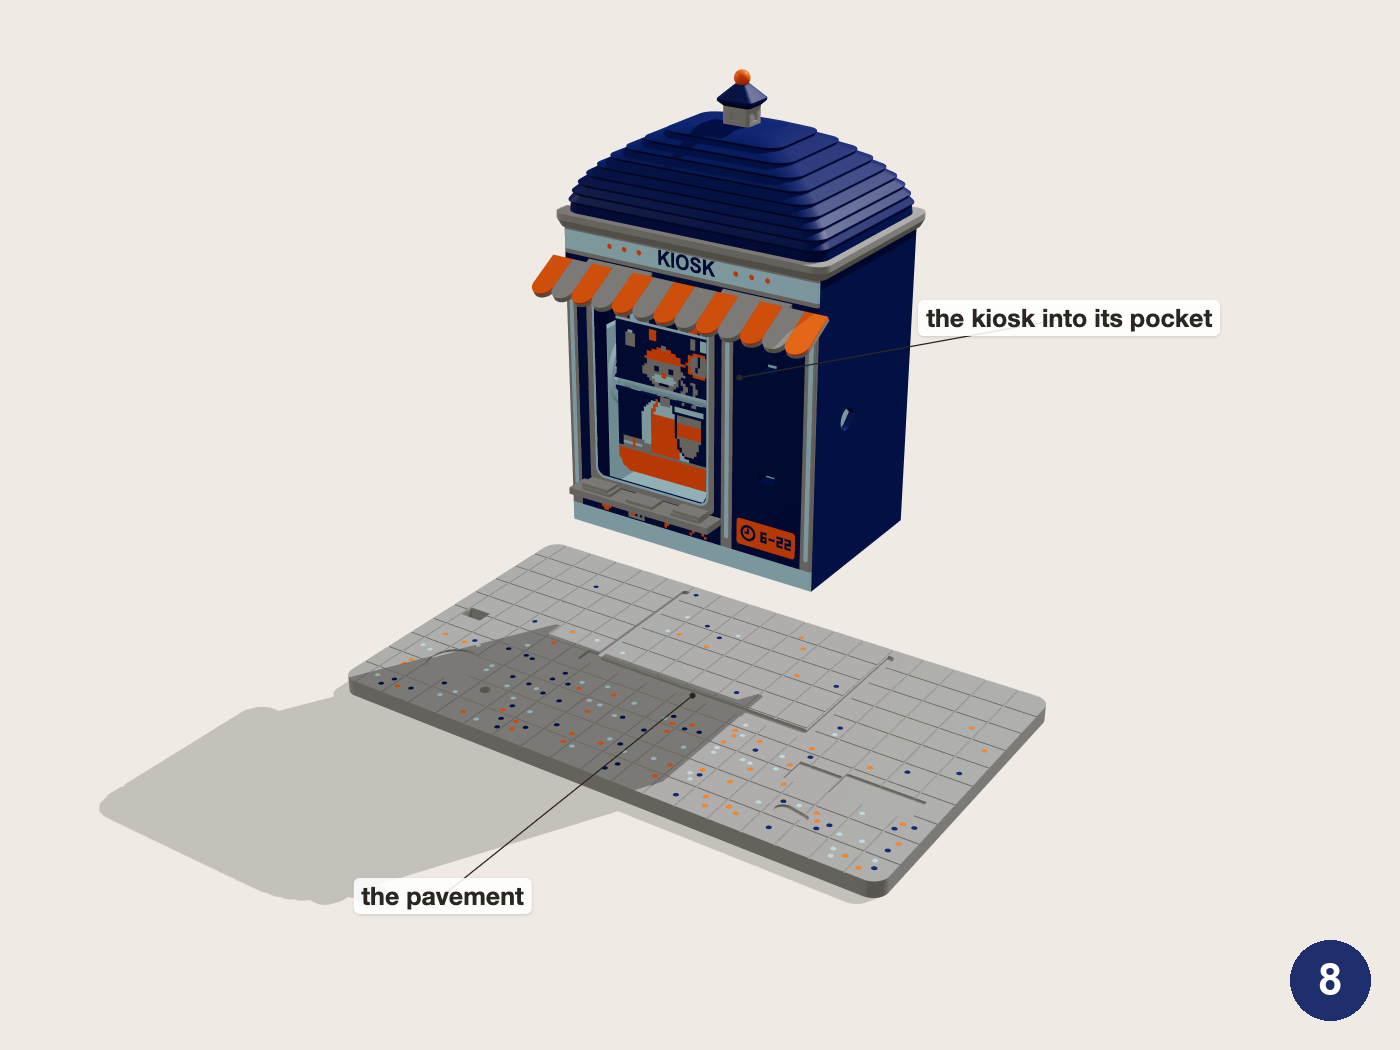
Lower the kiosk into its pocket in the pavement, the face toward the wide strip of pavement in front. It sits 1 mm deep and lifts out again.
9The magazine rack
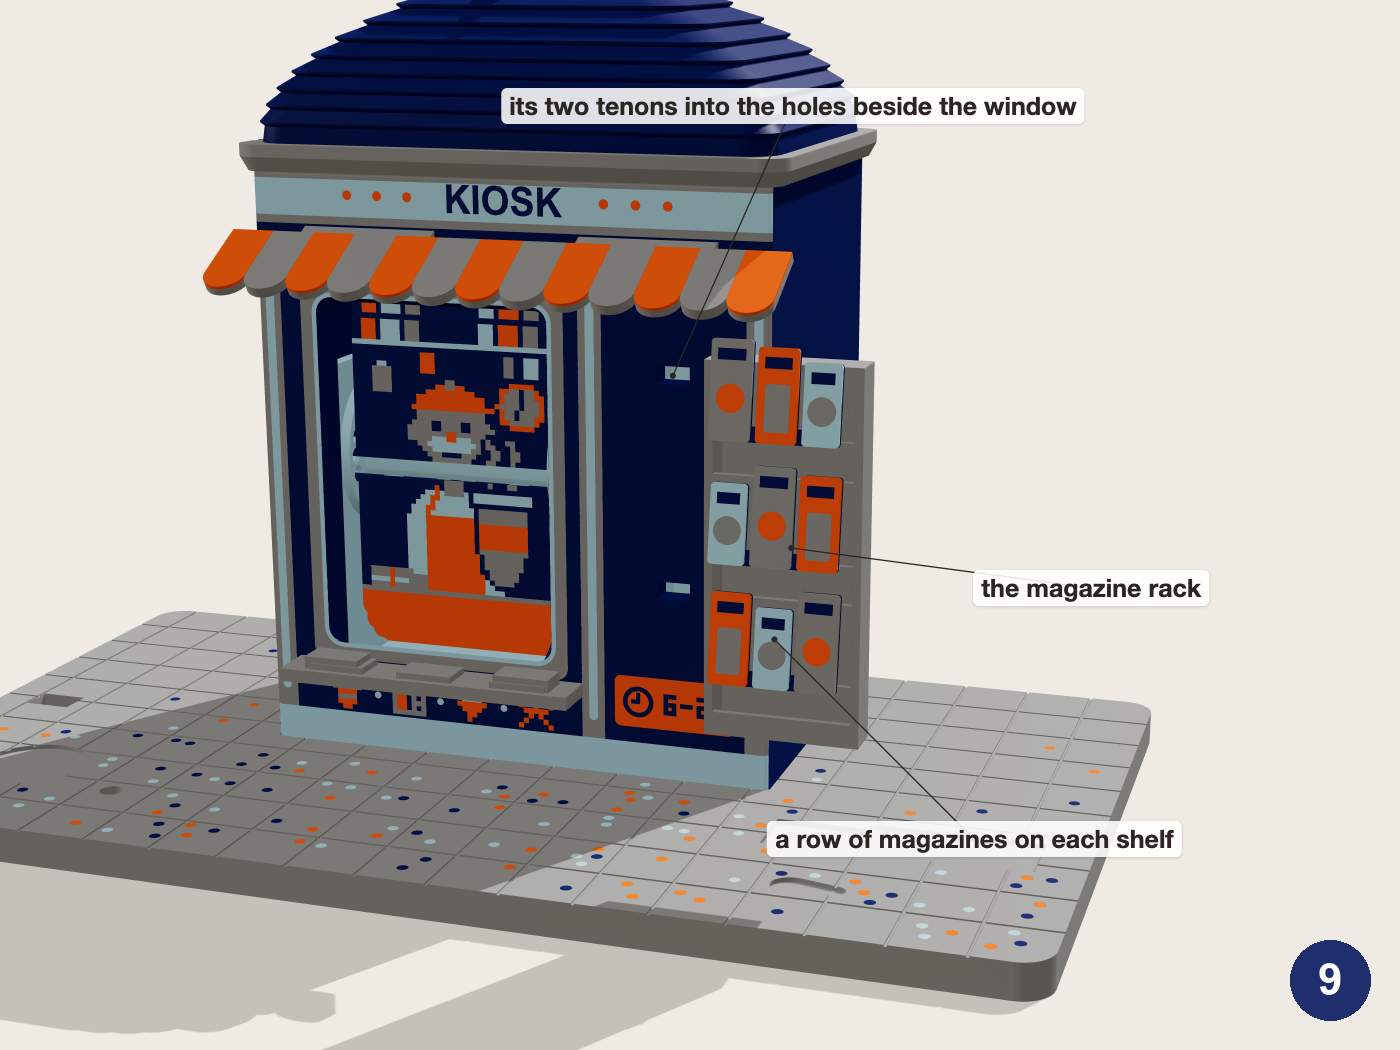
Press the rack's two tenons into the two holes in the face beside the window, on the crank side, the shelves' lips to the front. Hold the kiosk from behind as you press. Small ribs on the tenons hold it. Set a row of magazines on each shelf, covers to the front, leaning back against the rack. Every row fits every shelf. They only sit there, so lift them off before you pick the kiosk up.
10Crank and grip
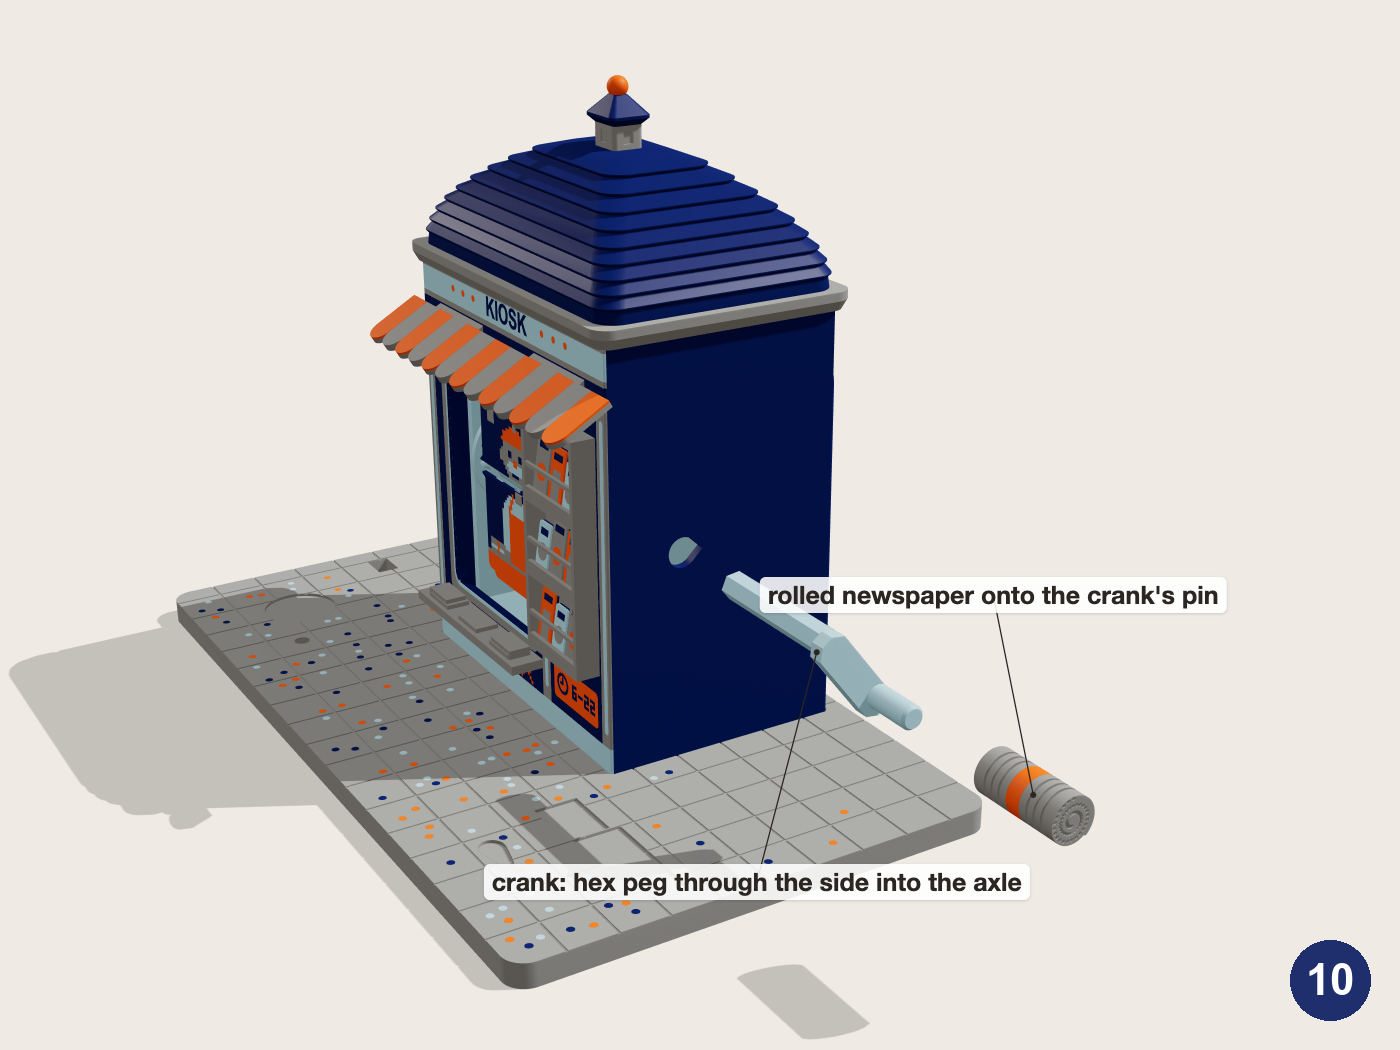
Press the rolled newspaper onto the pin at the end of the crank's arm, open end first, until it stops. Push the crank's hex peg through the kiosk's side into the axle's socket. Turn it anticlockwise (top forward): a picture flips at every click.
11The lamp and the bunting
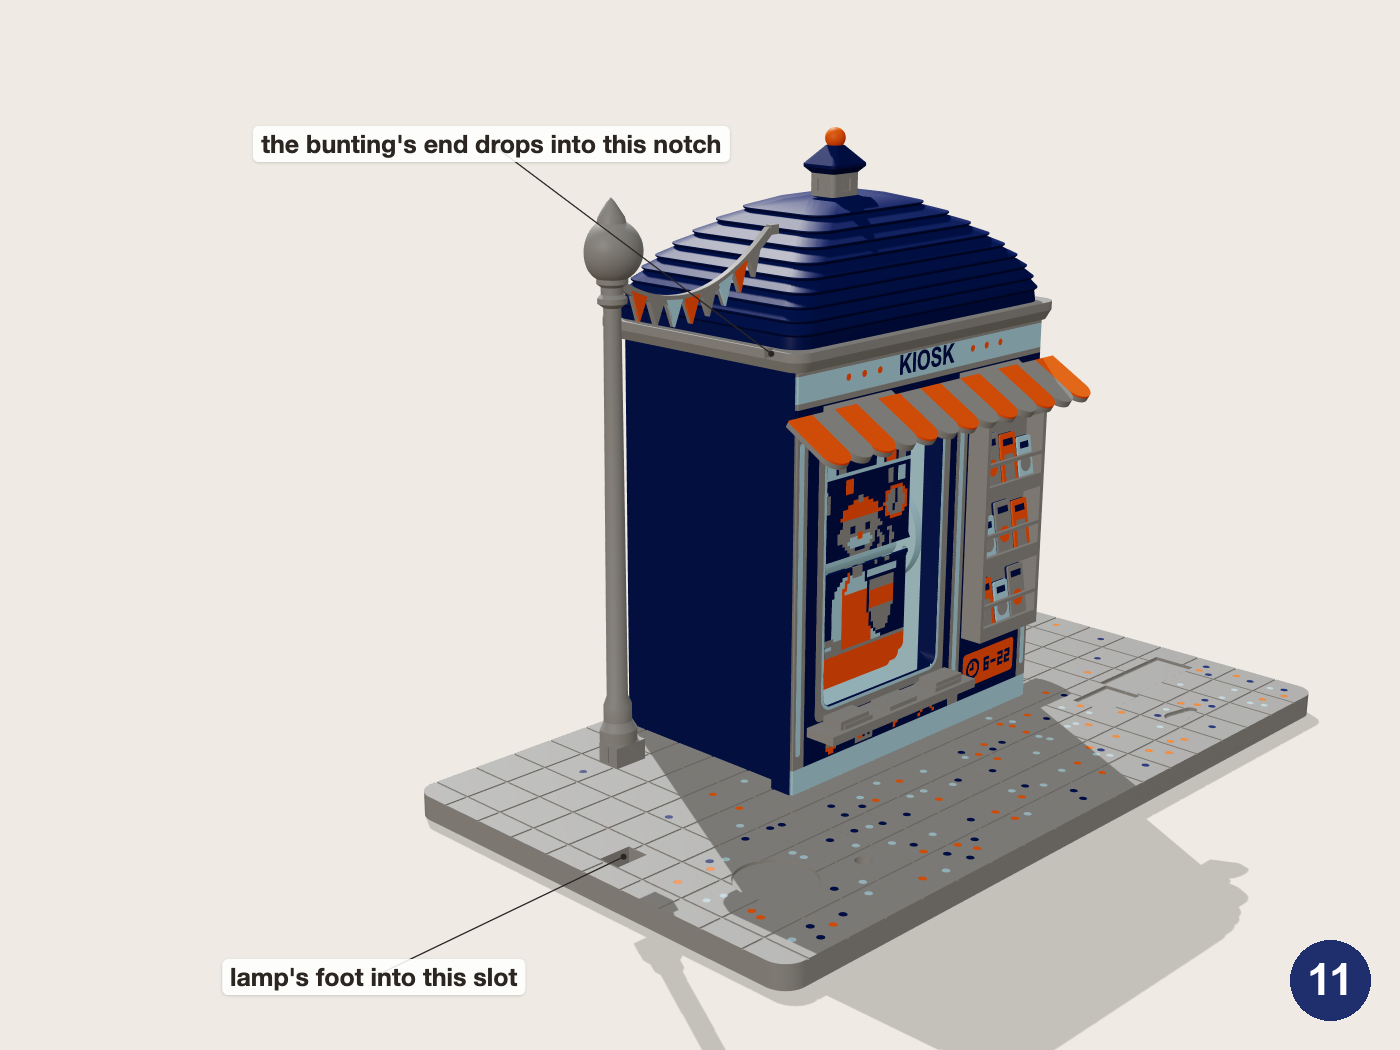
The lamp and the bunting are one piece. Lower it straight down on the kiosk's left: the foot goes into the slot in the pavement while the bunting's end drops into the notch at the corner of the roof's cornice. Press the foot home.
12The table
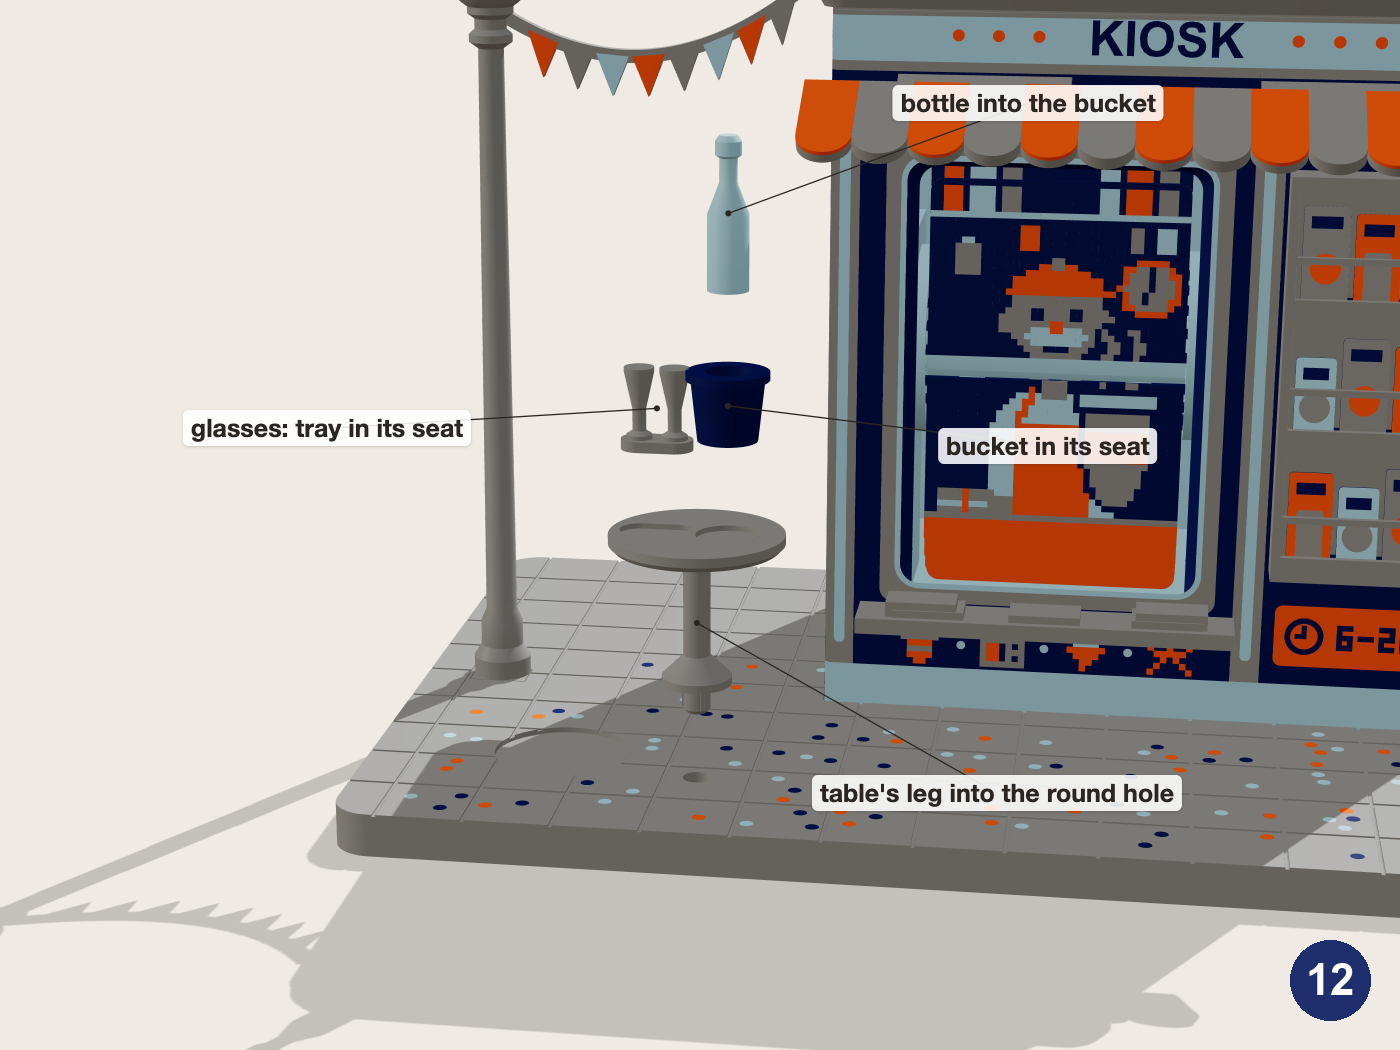
Press the table's leg into the round hole in the pavement by the kiosk's left corner. Set the bucket in the round seat on the table and stand the bottle in it. The glasses' tray goes in the other seat.
13Pillar box, postcard spinner and the rest
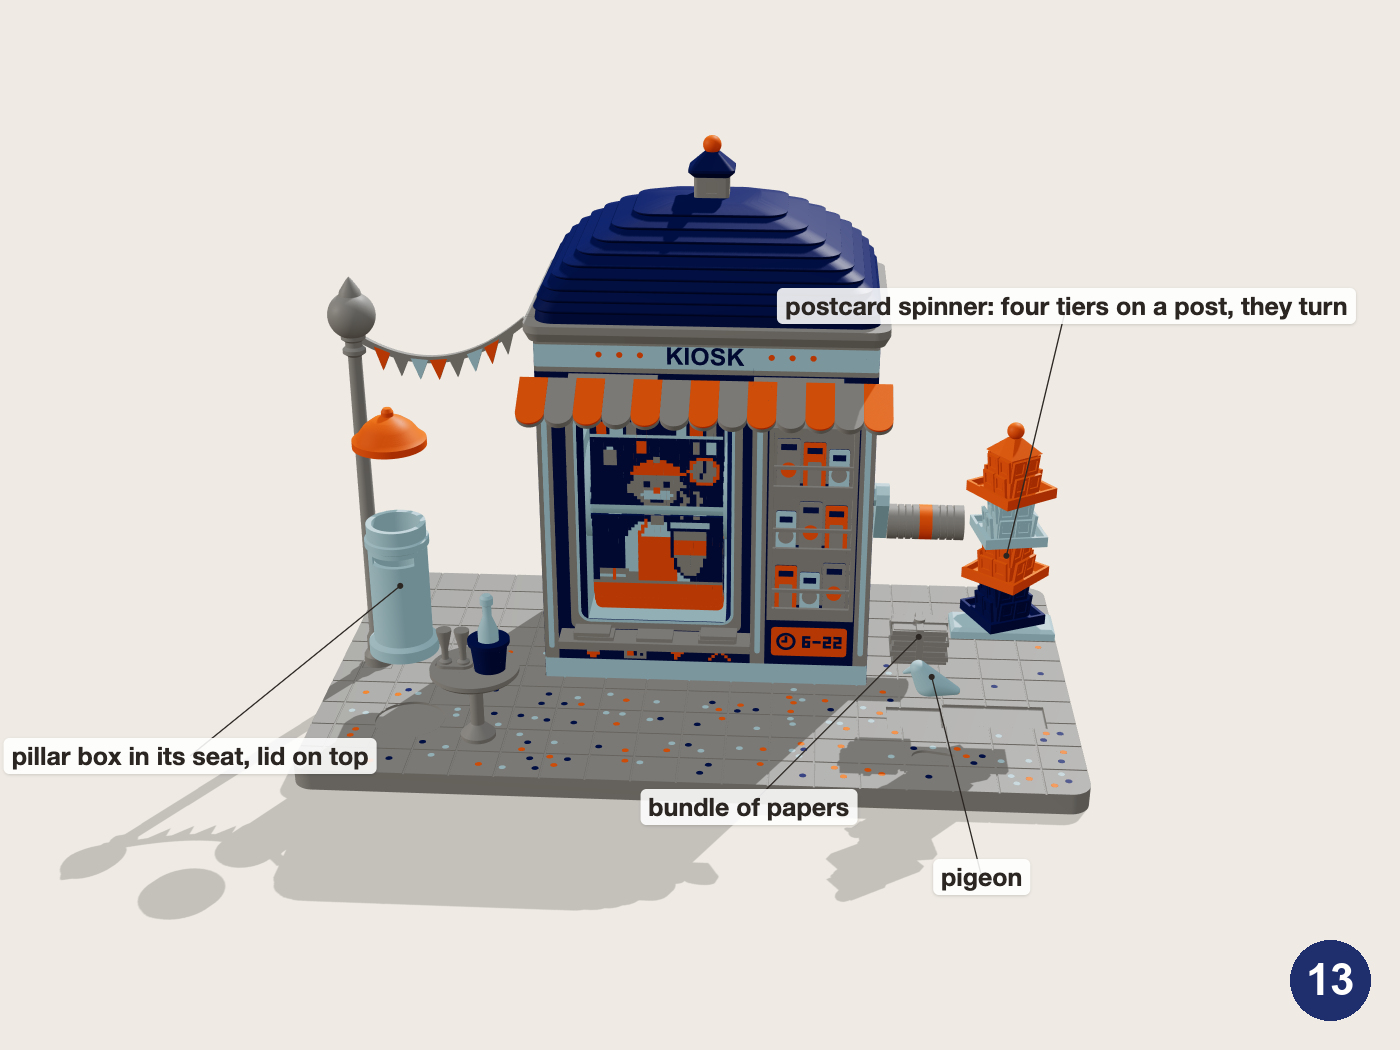
Stand the pillar box in its round seat on the left and put the lid on. A rolled note fits through the slot. Stand the spinner's base in the oblong seat on the right; its foot goes in either way round. Slide the four tiers over its post: dark blue, orange, light blue, then the orange one with the ball on top. Each stands on the one below and turns on its own. The pigeon and the bundle of papers go in the two small seats between the kiosk and the spinner.
If something is off
The two halves of a picture don't match
The flaps went in the other way round. Reload them in reverse order.
A picture rests half-flipped
Spool B isn't fully down: press it until it stops on the tube's end, so every tab sits in its hole.
The crank turns but nothing flips
The crank's hex peg isn't in the axle's socket. Push it fully home.
The axle turns backwards
The pawl bracket's pegs aren't fully in the divider. Press them home.
The roof rocks
A dowel stands too high. Push it further into its hole, or trim it to 11 mm.
A press fit is tight
Sand it a little. The small pieces reprint quickly from their plates if one is off.